Day 36: Laying the Groundwork
- Heather Calvert
- Feb 12, 2022
- 5 min read
Fresh Flooring Creates A New Foundation
Hello Pheasant followers! There has been quite the blogging hiatus over the last few months but with the new year and renewed vigor, I am back at it! Although I have not been able to do work on the trailer itself since November, I still have progress and updates that happened earlier in the year we need to catch up on, so let’s dive in!
At the end of May (I cannot believe it’s been so long!), once the exterior work had been mostly completed in preparation for painting, I took a short break to shift attention back to the interior. My goal was to install the new flooring – the groundwork for the tile, wall facades and cabinetry.
Although this did not need to be completed for the trailer to be painted, preventing further rust anywhere on the trailer is my main concern. The interior needed to be attended and sealed so that it did not cause me as much backtracking as the exterior has done.
After watching my good friend build her Tiny Shop, (The Clay House Studio), with her dad (@PlaneArtWoodworks), I was inspired to also insulate my floor in addition to what was already planned for the walls. After much research and brainstorming different methods, it came down to having to give up that portion of the plan. I wanted to preserve the interior height, therefore, building upwards from the frame was eliminated. Sadly, building downwards below the frame was also nixed because there was not enough space between frame and axels.
The solution was to opt for ¾” treated plywood (thicker than originally planned) to add just a bit more depth to take the edge off extreme temperatures. In place of corrected metal to protect the wood and waterproof the bottom of the trailer, I purchased a roll of 6 mil thick polyethylene film to serve as a moisture barrier between the baseboards and the plywood. Taking protection even further, I would also use spray foam insulation to fill the large cracks between the floorboards, seams around the perimeter.
I could not have completed this stage of renovation without my stepdad’s help. The weekend we tackled this task was almost 100 degrees and working outside for 12 hours was brutal; even with a giant fan and lots of ice water. To make it worse, our driveway is not shaded until about 2-3pm that time of year. This gave a whole new meaning to “sweat equity.”
Plywood
We started off by securing the floorboards properly and adding in additional screws. Not all the screws were replaced or fully tightened after we removed them to treat the frame. This made it easier to remove any boards if we needed to do additional work underneath.

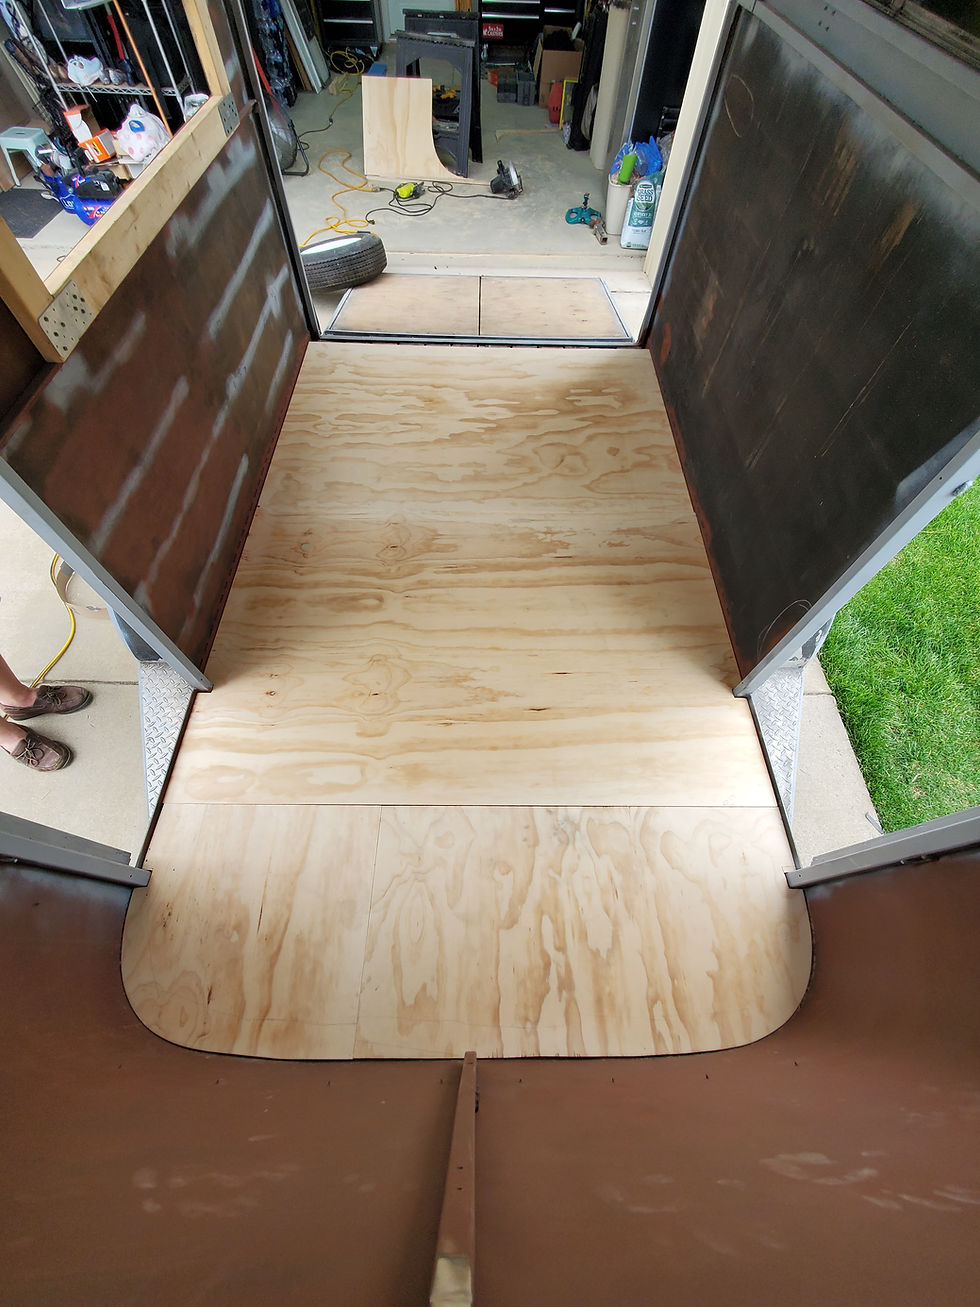
With the boards now firmly secure, we could begin preparing the plywood. With the cost of wood and building materials skyrocketing due to COVID, luckily, we only needed two 4x8 sheets to cover the whole surface area. The toughest part of this stage would be the front of the tailer with its curved sides.
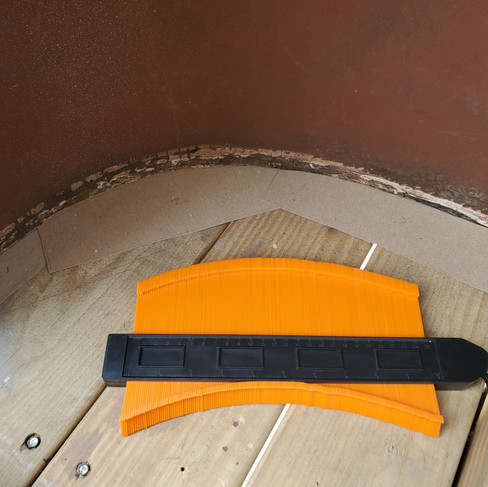
My dad has a very cool tool that, when pressed against a surface, creates a “mold”. I borrowed this to create a template of the front of the trailer. I don’t know how we could have done it without this little contraption and I highly recommend a tool of this kind of you are doing similar projects!
The template worked perfectly, but of course when I moved it from it’s position in the trailer to trace it onto the wood, it shifted slightly, resulting in the cut not being exact. We worked in small increments, careful to not cut away too much and wasting a sheet of material. It took us a good 1.5 – 2 hours to sand and cut little by little to make it fit like a glove. After that much effort, I must say that standing back to enjoy a moment looking at how perfect it looked installed was very sweet indeed.
LIVE & LEARN TIP: Use excessive amounts of very strong tape to ensure template panels don’t shift during movement. Little stirps of paint tape will not cut it.

Starting in the front and working our way to the back, the next sheet to be placed would need to be notched around the two door frames. Again, I used the molding tool to create templates of the sides. Fitting into the curved and notched areas were by far the hardest, most time consuming part! The remaining two rectangular pieces for the rear seemed to be cut and fit in no time at all.


At the very back near the ramp, the depth of plywood was taller than the frame and needed to be beveled for a smooth transition from floor to frame. Thanks to a good friend who is a very skilled woodworker and has tools galore, he was able to make quick work of this with one pass of the table saw. This cut allowed us to then quickly sand down the edges to refine the angle. (Check out his business, Magothy Workshop here.)


Moisture Barrier
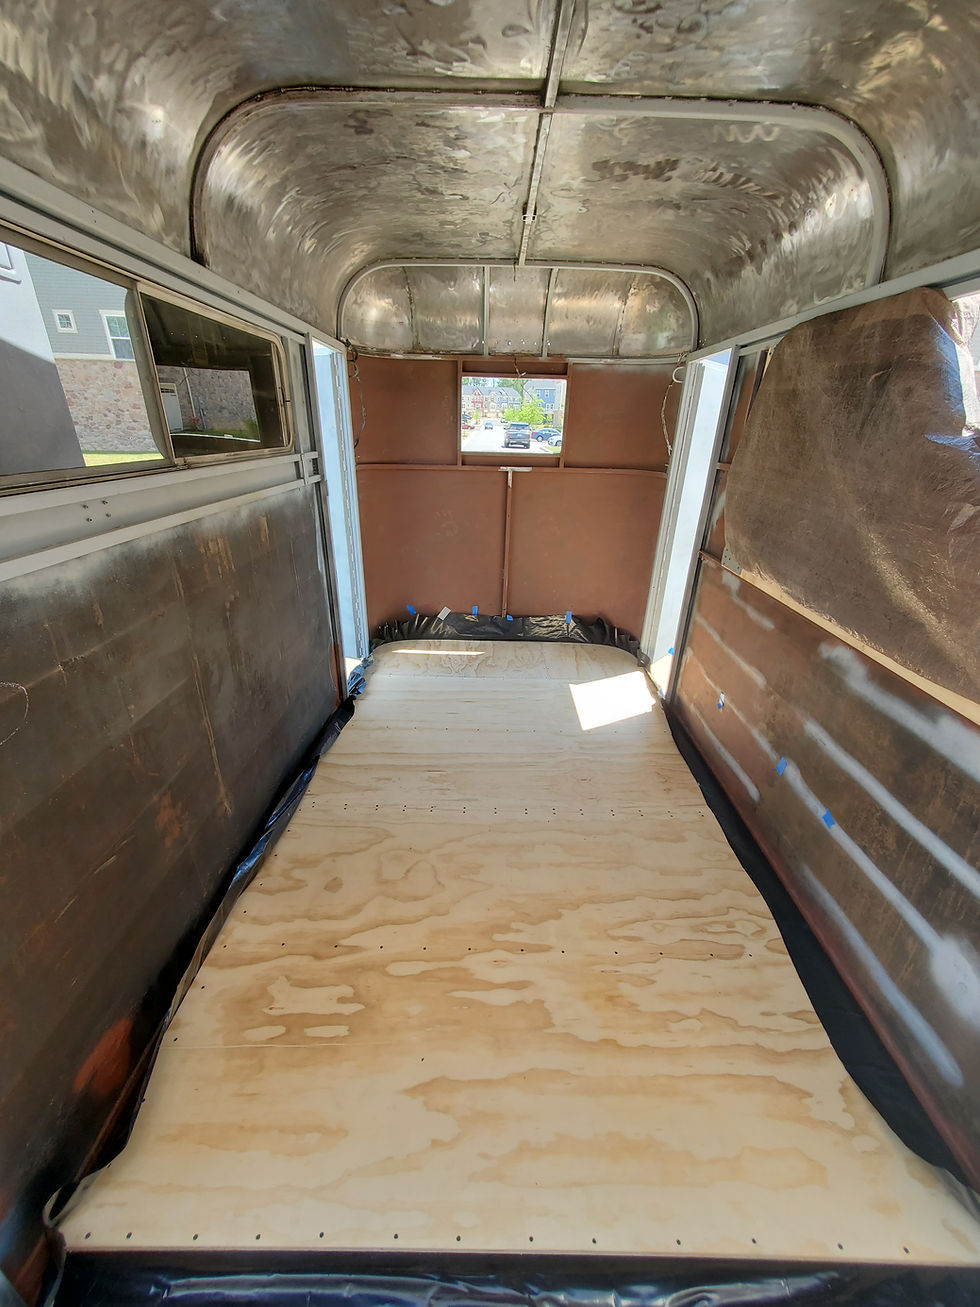
Once all pieces were cut and test-fitted we could remove them in order to lay the moisture barrier. This is the same product that is laid on floors prior to tile or hardwood installation. The roll was large enough to cover the surface area without any seams – creating a completely enclosed and sealed space. It was rather a bear to unfold and lay on my own and looked quite laughable once I had the edges taped up around the perimeter.


Barrier down, we were ready to put the plywood pieces back into place and securely screw them into the floorboards.
Next, I went around to trim the excess barrier, careful to leave a centimeter or so above plywood on ensure that the barrier would protect all the way up the sides of the wood floor.

Sealing
Now I was ready for the finishing touch: caulking around the perimeter!
This was my first time caulking anything and oh my it is not as easy as it looks! After seeing numerous videos of people (apparently professionals and misleading advertisments!) quickly caulking bathroom showers and sinks with a snazzy rubber tool, I assumed this was going to be easy-peasy. Well, that was fake news if I ever saw it!
I thought I was keeping even, constant pressure and even had a snazzy tool of my own, but it seemed to not do anything but wipe most of the material off and make a huge mess.
LIVE & LEARN TIP: When cutting the opening in the caulk nozzle, make sure that it is not cut too large for the gap you are to be working
In the end it doesn’t look too terrible, and at any rate it will be covered. The most important thing is that it will keep the water from seeping in from underneath the trailer and ruining the laminate tile and cabinets once they are installed. Considering how much more caulking I need to do elsewhere on the traile, I will be getting my practice!
The last step was to spray the insulation foam under the trailer to seal the cracks between the wood. This was a disaster.
After a few test sprays in the garage where all was working A-OK, I crawled under the trailer, and it quickly went downhill. The foam did not fill the gaps or stick to the wood, but simply fell off -down onto me. To make it worse, the wind had kicked up, so it pretty much went everywhere but where I needed it. My theory is that it might have been due to the extreme heat and it was past the max temperature for application and the foam could not solidify properly.
I was disappointed that this final step was not able to be checked off the list, but I will try one more time when the weather cools. If it does not work then, back to the store it goes! All in all, this was a big step and really makes the interior look much more polished and that we are progressing in the right direction!
Continuing to build a solid foundation,
Heather


Commenti