Day 25-27: Gazing Upward
- Heather Calvert
- May 2, 2021
- 4 min read
Updated: May 17, 2021
Three Full Days of Ceiling Restoration Reveals Beautiful Results
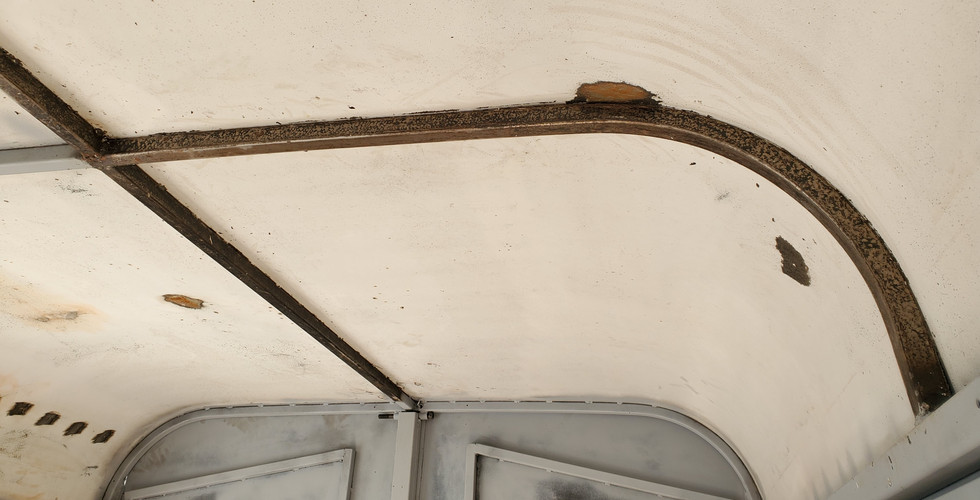
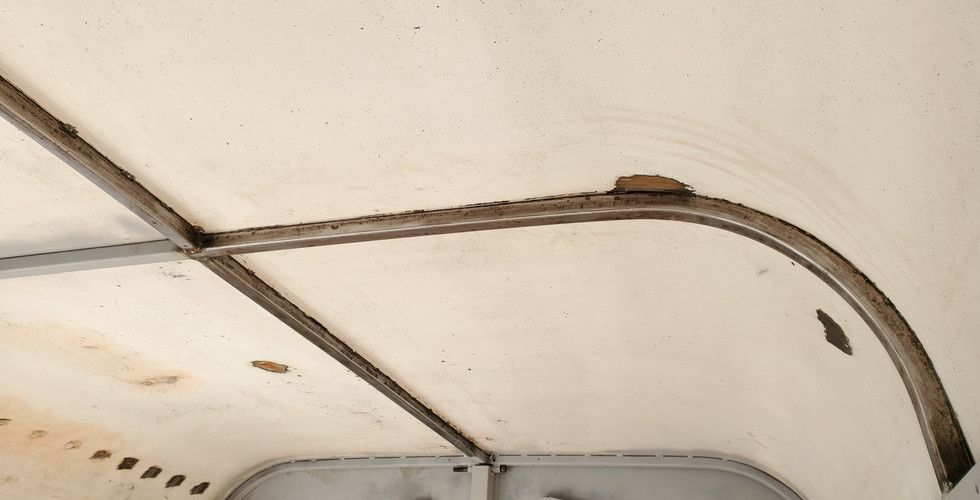
The Traveling Pheasant turns its eyes upward to focus on the arduous ceiling restoration process as part of our horse trailer conversion to mobile coffee bar.
In my last work session, I began by focusing on the front side and chipping the paint from the frame before moving to the smaller ceiling sections. Following the process of chipping, then sanding away the remaining goo - first by electric sander then by hand - the frame and one of the sections were restored to bright gleaming metal. I was ready to dive in and reveal even more hidden beauty in this second session!
Day 1
Today, my aim was to finish chipping the remaining paint from the rest of the frame. After the progress of last week, I had about 50% left to restore. I worked as far as I could until I needed to remove the existing light fixtures and wires. The fixtures will end up being recycled as a brand-new custom one will be taking their place!


In the end, the day took longer than I would have hoped because of the black goo. It seemed to be much thicker and more abundant especially towards the back of the trailer. When sanding and chipping with the paint scrapper were not doing the trick, my stepdad came to the rescue and suggested using a razor blade instead. Thankfully, I had much better luck with this and allowed me to finish the frame for re-painting.


Day 2
After the trials of sanding and stripping the stubborn paint and goo on the exterior, I wanted to find a tool or solution to make the process faster and more efficient. I did some research and I stumbled upon a product called “Paint Eater” by 3M. After a frustrating trip to Lowes and Home Depot where I discovered this attachment only works with 3M’s own power tool, I was able to find a similar attachment to fit our grinder. Enter the Quick Strip Disc by AvantiPRO.

Unlike the other grider attachments I used to smooth metal after welding or removing the window bars, this particular attachment was porous. This was key because the sticky black goo under the paint has clogged and ruined sand paper and grinder pads. This disc was meant to allow for dust to flow freely way and not create this buildup.
Crossing my fingers and praying that this would be the solution I needed, I decided to begin with the quadrant that was in the worst shape: the rear passenger side. Standing on my little step stool, holding up the 8.5 lb grinder at shoulder level, I took my first couple of passes.

The good news was that it appeared to do the job well. The bad news was that this was going to be a long process and a major arm and neck workout!
I was pleasantly surprised that once I got into a rhythm, I was able to sand the whole quadrant in about an hour without the breaks I needed to stretch out my arms and neck.


Most of the goo was removed with the paint, but there was still a thin layer that needed further sanding. I used 80 grit to remove the stubborn areas and to edge in around the frame where the grinder could not reach. This fine detail work and trying to get into tight spaces was the worst part!
On the upside, with the frame and one quadrant down, we are off to a great start!
Day 3
Now that the worst portion of the ceiling had been smoothed and beautified, I would begin work on the next in greatest need – the front drivers side. Back when I was sanding and painting the interior sides (link), I started to chip away and remove some rusted paint on the adjacent roof portion. I tried and failed to then feather with a hand sander to blend it with its surroundings. With this new attachment tool, I would try one more time to simply feather around the chipped areas to avoid having to strip the whole ceiling…


Sadly, it didn’t work. The black goo had no intention of making any kind of effort to cooperate and therefore, the whole area needed to be stripped. It was a shame that I didn’t have a simpler scenario, however, I had been worried that when I spray painted the finished areas that you would see a noticeable difference in the texture where there was sanded paint vs where there was pare metal. In the end, I would prefer everything to be uniform anyway.

Breakthrough With The Paint Stripper
While testing methods that worked best to remove the paint and goo on the small front ceiling sections, I first tried Goo Gone but had no luck. Next, I returned to the paint stripper one more time I hopes that it would finally redeem itself. Thanks to my impatience, I learned that the goo scrapes off best when it is not left to completely dry like is instructed on the back of the bottle. Instead, when the stripper still in a gel state, the goo would scrape off like cutting into a soft cheese. This method allowed me to get the majority of it off, but it would still require some sanding. I don’t anticipate it taking very long now that the layer is far thinner.
As I was cleaning up to drive the trailer back to my aunt’s house, I made another accidental paint stripper discovery that would help tremendously in future efforts battling the black goo!
When wiping off the excess gel around the frame, I discovered that the paint stripper works even better when it is rubbed rather than scraped off. It was like I was using a polishing wax! When it was wiped way, it revealed clean shiny metal underneath! I am so excited to go back and apply this to the two areas stripped today in our next session to save me from having to sand!
Until next time, I am off to order more grinder attachments because after just two quadrants mine is almost worn bare! It’s a physically challenging process but it is a relief to be halfway finished!
Waging war against goo & making discoveries along the way,
Heather
Comments