Day 24: Starting to Look Up
- Heather Calvert
- Apr 8, 2021
- 4 min read
The Interior Roof Restoration Begins
Last week heralded the start of 2021 progress and brought us another step closer to opening The Traveling Pheasant mobile coffee bar!
The first goal of the new year is to restore the interior roof. This means stripping the entire surface area of its chipped paint so that the fresh coat can be applied smoothly. It is important the ceiling is in pristine condition because it is the only part of the interior design that will not be covered with a façade.
I was supposed to begin this daunting goal last week but got sidetracked by the two side doors. I noticed they were in need of additional sanding work while I was painting the front side wall. Not to mention, I was on a painting rampage, they were a huge eye sore, and were also in need of a coat of primer. Even though the areas are smooth as silk to the touch, they look rough to the eye. Seeing areas that I have worked on with a fresh coat of paint makes me feel like I have actually accomplished something.
Last session, I managed to finish the driver’s side door but ran out of time and daylight before reaching the passenger side. This is where I am picking up this week, then I promise, I am making a start on the ceiling!
Side Door Transformation
It was another brutally cold day and as the paint on the service side window had now dried, I left the tarp covering the window to block the icy wind. (I am currently using a tarp as our awing cover has not yet been attached) After trying to tough out the cold, I caved and brought in the little space heater and my goodness, that little guy can put out some heat! I was actually quite toasty in there!
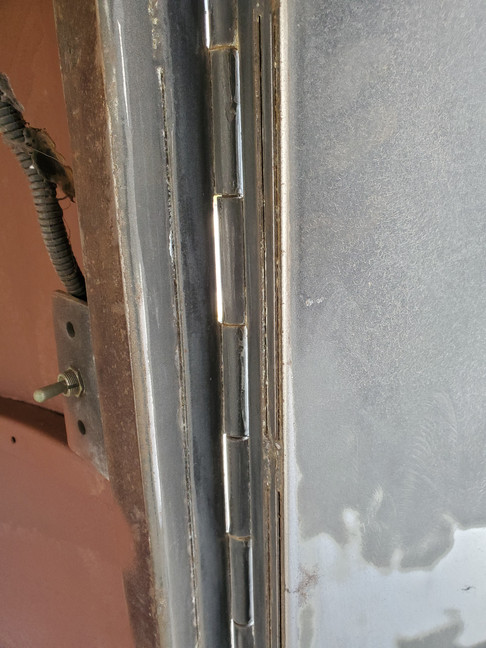
I began by fine tuning the finish on the interior frame, moved to the painstaking work of sanding the chipping paint from the hinge crevices, then went over the surface area of the door itself and around its perimeter.
At last it was time to prime and again, I felt so accomplished looking at the end result!
Starting To Look Upward
Now, on to that dern ceiling! To make the process feel less overwhelming, I am dividing the areas to work on one at a time. The process will also be two-fold. First, the framing needs to be stripped, then the ceiling surface itself.
I decided to begin with the front area since the wall is so beautifully primed now and a completed ceiling would be the finishing touch for this side. Using the scraper on the frame, the brittle paint flew off easily and scattered the ground like confetti. Unfortunately, the blasted black goo that appears to be under all the paint I have sanded so far is once again present and will require an additional step to remove.


Although the paint came off with relative ease, it was still a slow process! When I reached the middle, it was time to remove the old lighting fixture and throw it in the bin! I was excited to use my new power tools from Christmas to unscrew it, but discovering the amount of dead bugs underneath, my Stepdad needed to be called in to finish the job and prevent me from gagging!
To remove the sticky black goo under the paint by hand, I used 80 grit sandpaper followed by 40 grit to polish off the scratches. I was shocked to see the metal shine so brightly and was a sad to spray the primer this time because it was so pretty!
Next, it was time to focus on the 4 ceiling sections. These are the biggest challenge of the whole roof due to the wiring and curves. I had to experiment with how best to tackle them. My first attempt was to use an electric sander with various grit sandpapers. To my disappointment, no matter how hard I tried, I was not able to feather in the damaged areas. My second attempt was to use the scrapper and chip away the paint like I did one the frame, then sand to a polished finish. This worked great on the one panel but not on the second. For whatever reason, the paint must have been thicker, but it was not willing to part with the metal. Experiment #3 began with once again trying the paint stripper.


This helped only marginally and left a lot more work to be done. The far left and right corner panels pose the most difficulty because of their concave bowl-like shape. Since there were very little issues with the paint, I had wished to simply hand sand the area smooth. After further thought, I was worried that when they were repainted it would show a different texture and stand out from the fully stripped panels. Therefore, I need to find a way to strip the paint from this area too. I will need to find a stronger paint stripper (even try acetone) and see if I can find a scraper with the right curves.
All in all, I was very happy with the progress today. The two side doors now look wonderful and a good start has finally been made on the roof. Stay tuned as the experiments continue and the ceiling is transformed into something magical!
“Difficult roads lead to beautiful destinations” - Unknown
In pursuit of beauty,
Heather


Comments