Day 21: Can I Take Your Order?
- Heather Calvert
- Mar 11, 2021
- 4 min read
We Now Have a Service Window!
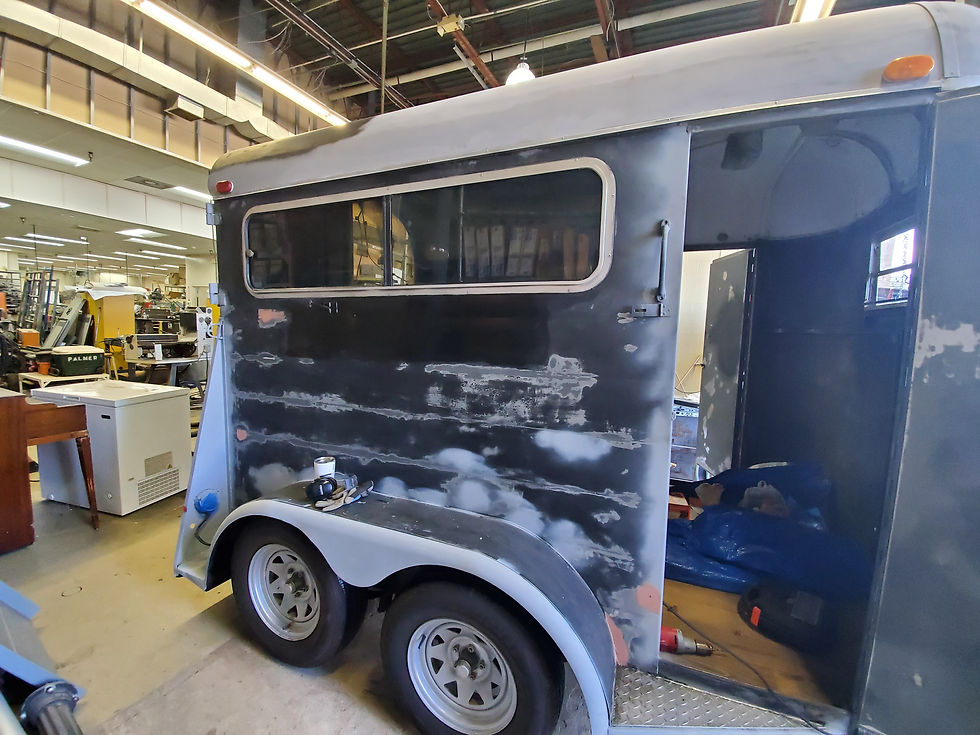
In my mind, there are three major steps in the renovation process of turning the horse trailer into a mobile coffee bar. First, is cutting out the side service window and installing the awning. Second is applying the new coat of paint and third is installing the interior counter countertops.
Today is finally the day I get to check the first step off the list! My dear friends who’s help was invaluable with welding, were once again happy to lend their time and power tools.
Making the Cut
We set out early taking “Betsy” to the shop to undergo her plastic surgery. The first order of business for Betsy was to undergo the pre-op procedure of removing the existing window. This was surprisingly easier than I had anticipated.
The window had been secured with pop rivets and in order to remove them, we went around and drilled through the face of each one. Once the rivets were drilled out, we used a wedge to pry it out of the frame. Once popped out, what little of the original silicone remained was then scraped off.
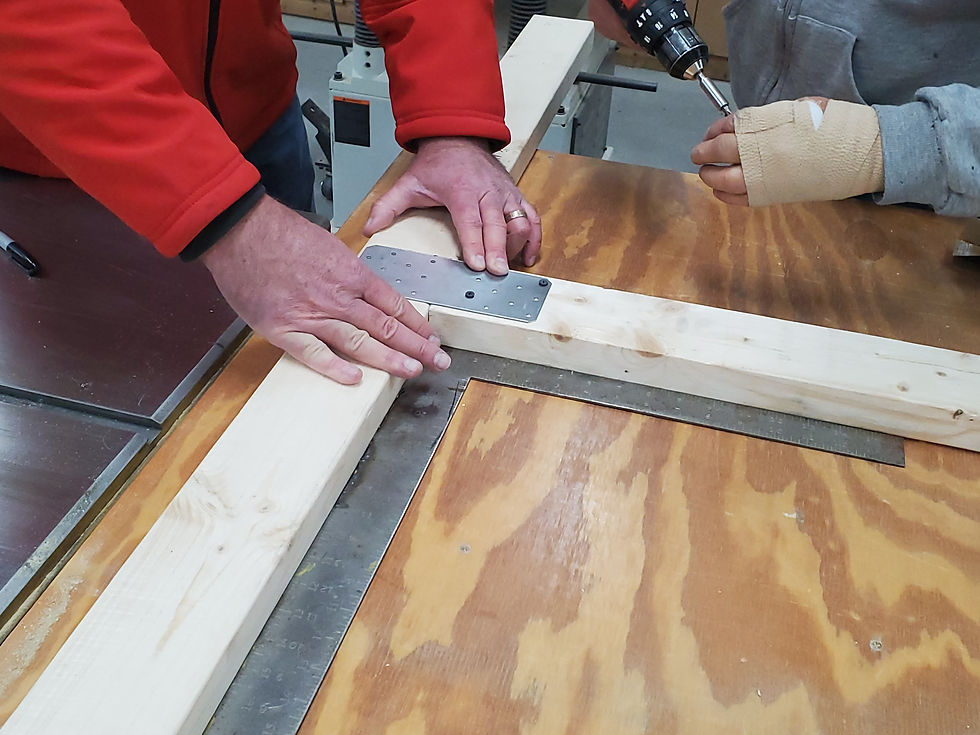
We were ready to mark the cutlines! Thanks to the groundwork for operation window from a few weeks ago, we had the pieces of the new wooden frame cut and ready to be screwed together. Once assembled, this provided the temple we needed for cutting. It was aligned, leveled and secured into place inside the trailer.
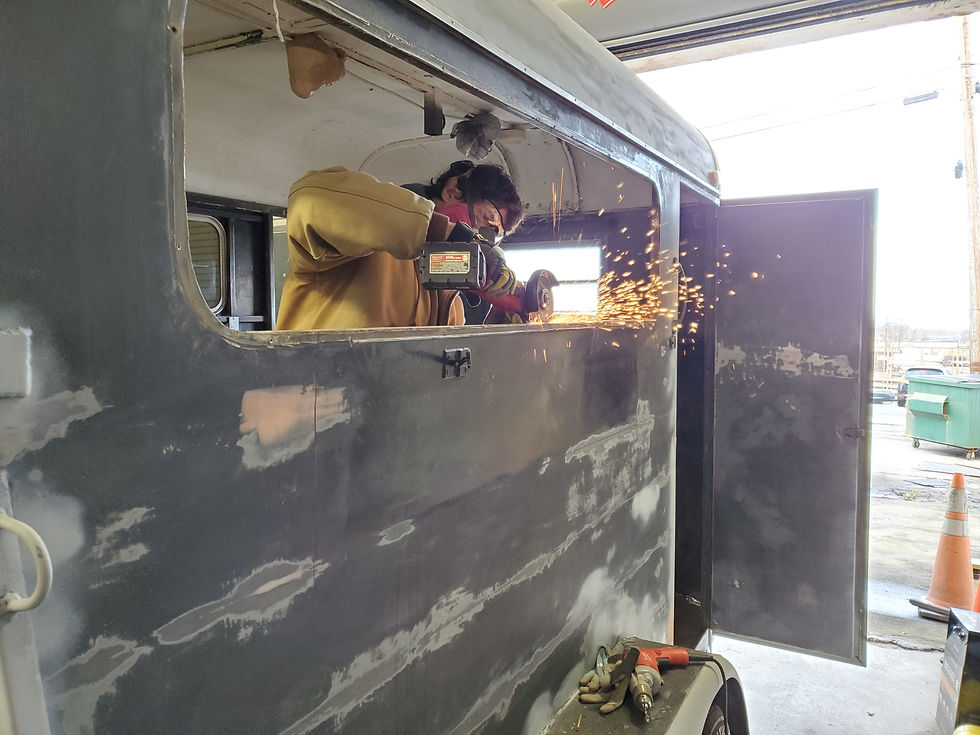
After some discussion, it was determined that cutting would be easier if done from the outside rather than the inside. Therefore, a hole was drilled into the bottom two interior corners to mark the cutting parameters from the exterior of the trailer. We then used a sharpie to mark the front where the frame lined up. This allowed us to draw the vertical cut line and the holes in the corners allowed us to draw the horizontal one. A scrap piece of L channel metal was clamped into place on the exterior to serve as the saw guide.
I stepped back, poised the camera into position and held my breath! Then before I knew it, the metal was cut and the side of my baby trailer had a gaping hole! No going back now!
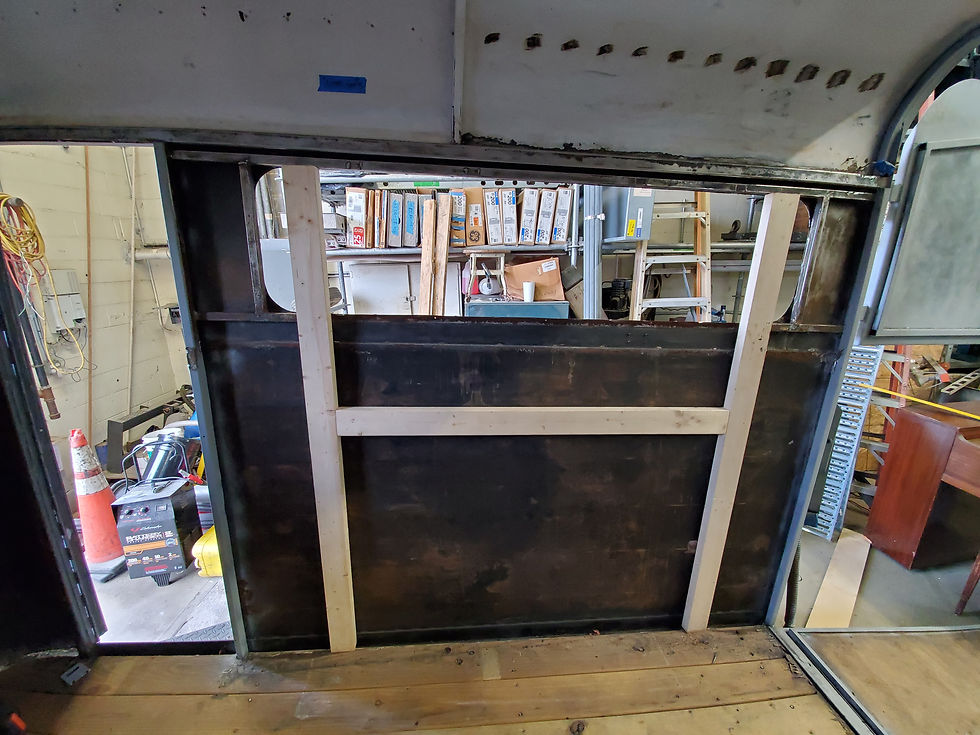
Next up was to prep for patching the two sides were the previous window had been. In order to do this, we first needed to make the corners into right angles. Once the rounded corners were transformed, we could take accurate measurements for the patches.
I was unable to take any real filming of the welding work due to the dangerous light emission, but picked back up when it was time to grind down the welded joints. Out came the largest grinder that I have seen so far! (We were really bringing out the big guns!) Carefully and painstakingly, the joints were polished smooth, and the end result was a proper service window opening!
It was now time to test fit and secure the interior wooden framework. The original plan was to cut out two sections of the lower metal horizontal support bar so that the two wooden vertical posts could be flush against the trailer’s side. We would then use L brackets to secure the remaining metal support to the new wooden posts. After further consideration, we deemed that it would be easier to remove the metal support bar intact, lower it to be flush with the bottom of the wooden frame, then re-tack it into place. With this new position, the wooden vertical supports could be cut shorter and the frame would simply rest on the top of the metal support bar.

Once in place, they were both screwed together using self-tapping screws. The top of the wooden frame was secured to the existing metal frame using a U bracket and also, self-tapping screws.
Creating the Awning
I came up with the concept of the awing from watching YouTube videos from others who have done similar projects. It stems from the brilliant idea of using the piece of metal you cut out of your food truck to create the opening, then laying in into a frame just slightly larger than the opening so that the awning covers the entirety of the service area. My problem was that I didn’t have a solid sheet of metal being cut from my trailer – mine had the area where the window had been. (The good news is that my metal was able to be used to fill in those side gaps! I love recycling!) I needed to find a sheet of metal that was large enough as I did not want seams on this piece.

Thankfully, a size just large enough was laying around as scrap in the shop and was generously gifted to me and The Traveling Pheasant. The frame was created using 1” L channels welded together at the corners.
Here is where I learned more things about metal and chemistry. Welding/Soldering these aluminum pieces (used instead of steel because they were lighter) is a different process than welding the steel on the trailer.
Aluminum has a lower melting temperature, however, due to other chemical characteristics and different reactions to heat, it presents many varied challenges compared to steel welding. While welding the steal, we used a method called MIG (metal inert gas) welding. When creating the aluminum frame, we needed to use another method called TIG (tungsten inert gas) welding. Long story short, instead of using the welding gun that feeds the welding wire through molten hot like a glue gun, TIG welding uses long rods to fuse two metals together. It requires you to heat the welding metal over the spot needing to be joined so that it melts enough so that you can then “rub” it on the joint like a glue stick. Sounds much easier than it is!
PSA: These descriptions are my simplified version. If you are looking for more detailed information or processes, please seek more research from expert welding sources.
In the end, Betsy left the shop with a brand-new service opening and a custom fabricated awning to serve as it’s cover when not in use. The surgery was successful, and Betsy is recovering nicely.
I am so incredibly grateful to my friend Jon and his Dad who pretty much learned how TIG weld to do this in order to help me. It was an experiment for sure and lots of things learned along the way! Their help in this project has been invaluable.
Doing a happy dance,
Heather
Comments